Usage
Before connecting to Euroscope
When you open TrackAudio without Euroscope connected, the message "No VATSIM connection detected!" will be displayed.
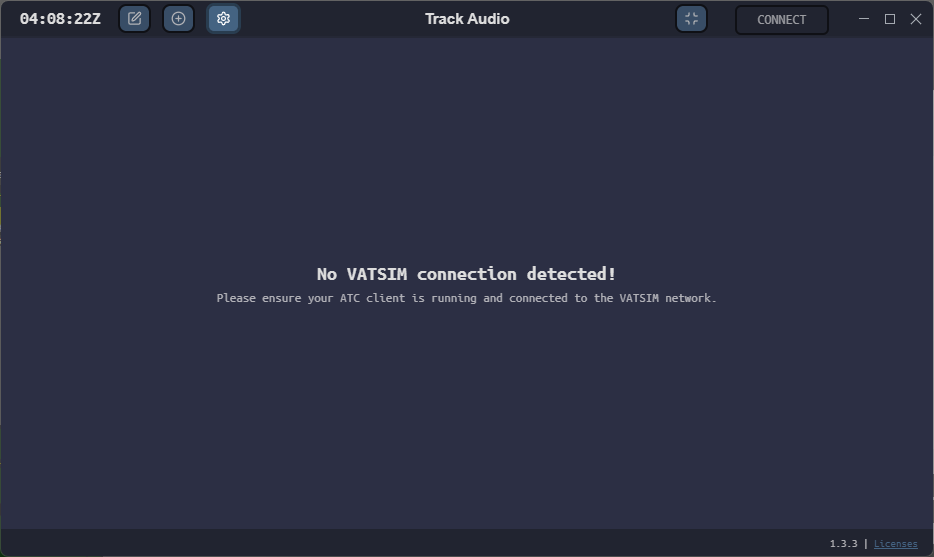
Attention!
Make sure EuroScope is running and connected to VATSIM with your control position.
After connecting to EuroScope
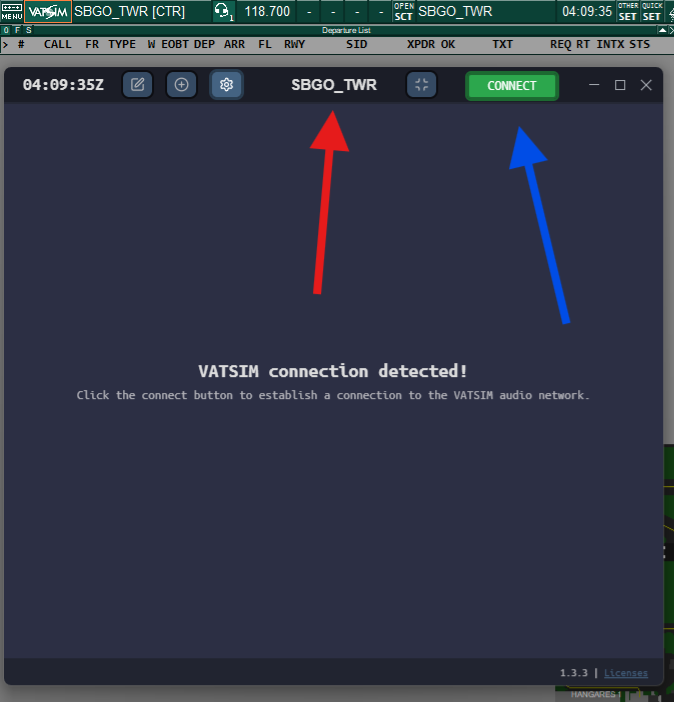
As soon as Euroscope is properly connected:
- Your callsign (in this example,
SBGO_TWR) will appear at the top. - The CONNECT button will become active in green, indicating that you can click it to connect to the VATSIM audio server.
Connected to the audio server
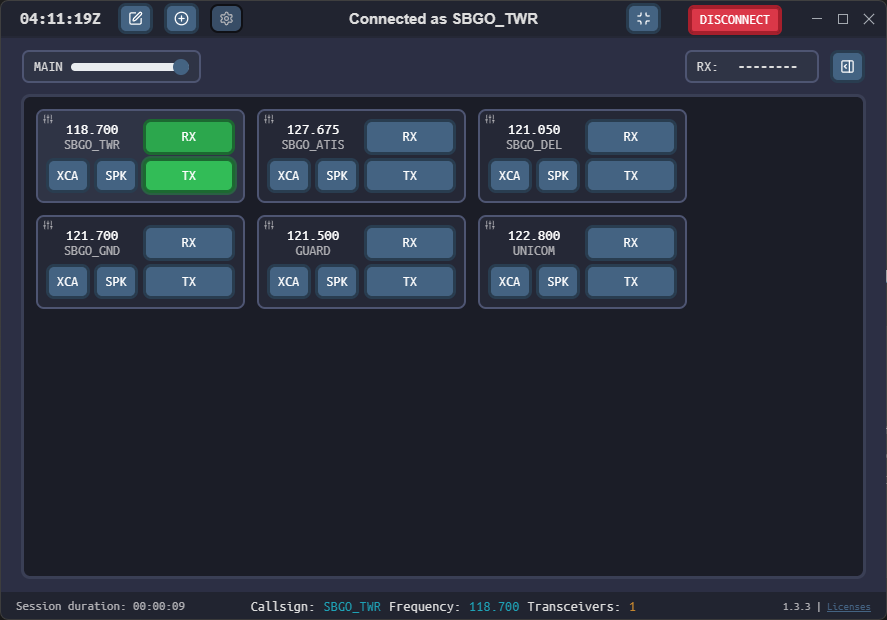
After clicking CONNECT, the system connects automatically and displays the available frequencies based on your position.
Important!
The system does not enable frequencies automatically. You need to manually select the RX and TX buttons of the frequency you want to use.
Example: frequency 118.700 MHz (SBGO_TWR).
Available buttons:
-
RX (green): you are listening to the frequency. It turns ORANGE when there is an active transmission.
-
TX (green): ready to transmit. It turns ORANGE while you are talking.
-
SPK: plays the frequency audio through the speaker.
-
XCA: enables transceiver cross-coupling (explained below).
During Transmission (TX)
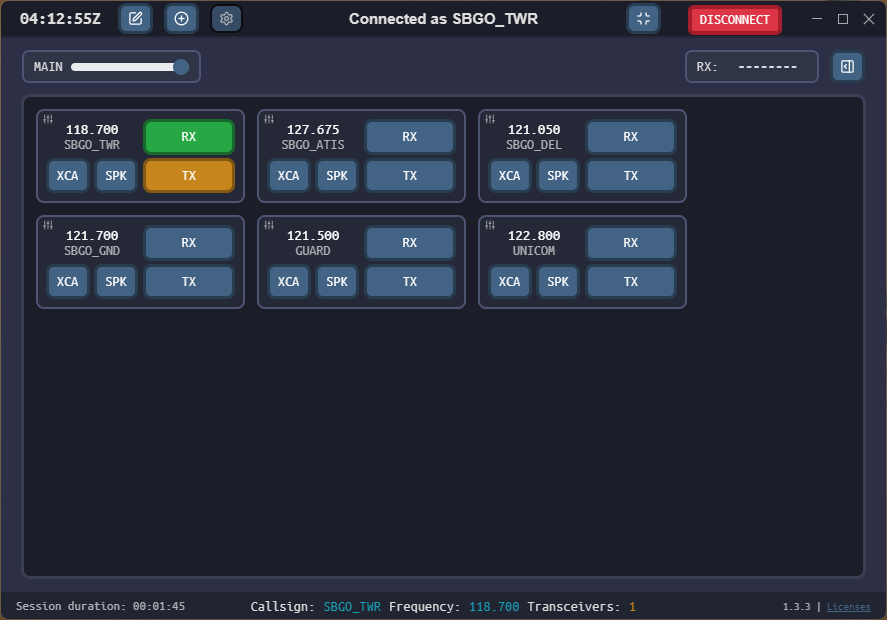
When you press the PTT (Push-To-Talk) button, the TX button of the selected frequency will turn orange, indicating that you are transmitting.
XCA and XC Functions
🖱️ Right-click the XCA button:
- Enables cross-coupling between transceivers on the same frequency. - Allows pilots in different areas of the FIR to hear each other.
🖱️ Left-click the XCA button:
- Enables cross-coupling between different frequencies (XC).
- Allows different frequencies to be joined, but must be used with caution.
✅ Always use XCA when controlling with multiple active transceivers to ensure optimal voice coverage.
Frequency Edit Mode
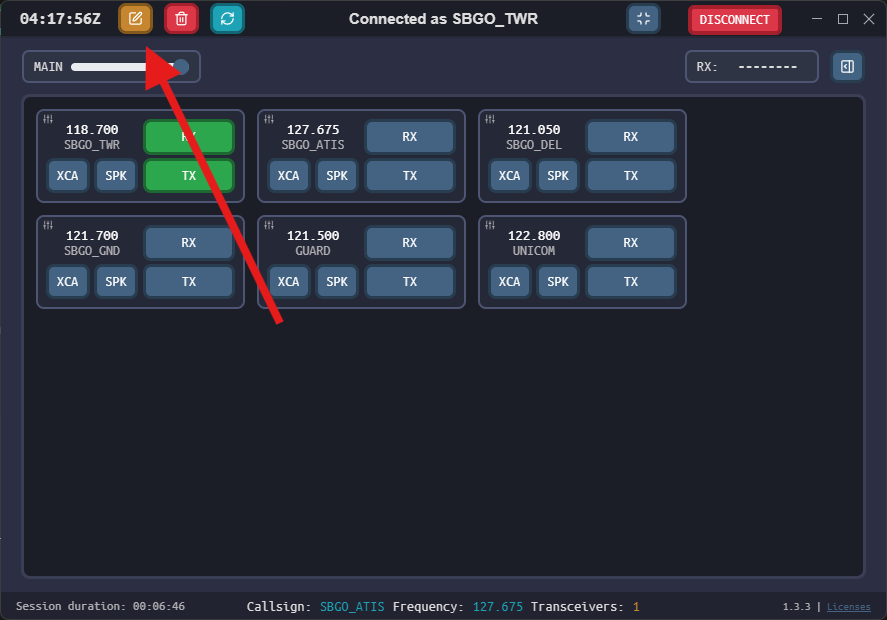
When you click the pencil icon at the top, the button will turn orange, indicating that edit mode is active in TrackAudio.
This mode allows you to select frequencies you want to delete from your current list.
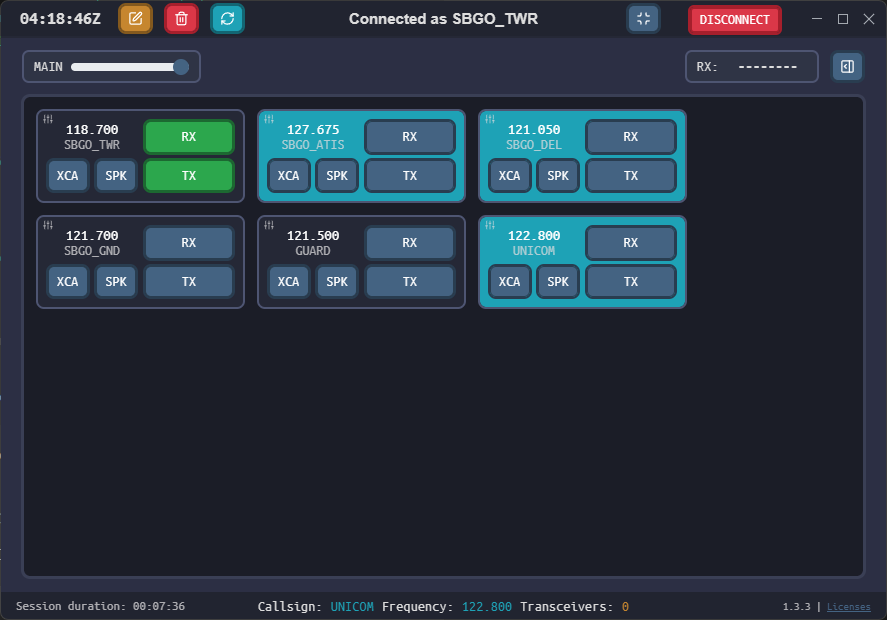
Frequencies selected for deletion are highlighted in light blue. Just click the red trash can to remove them from your interface.
🔹 This function is useful for organizing and clearing out frequencies that are not in use, especially when multiple positions are loaded automatically.
Listening to Multiple Frequencies Simultaneously
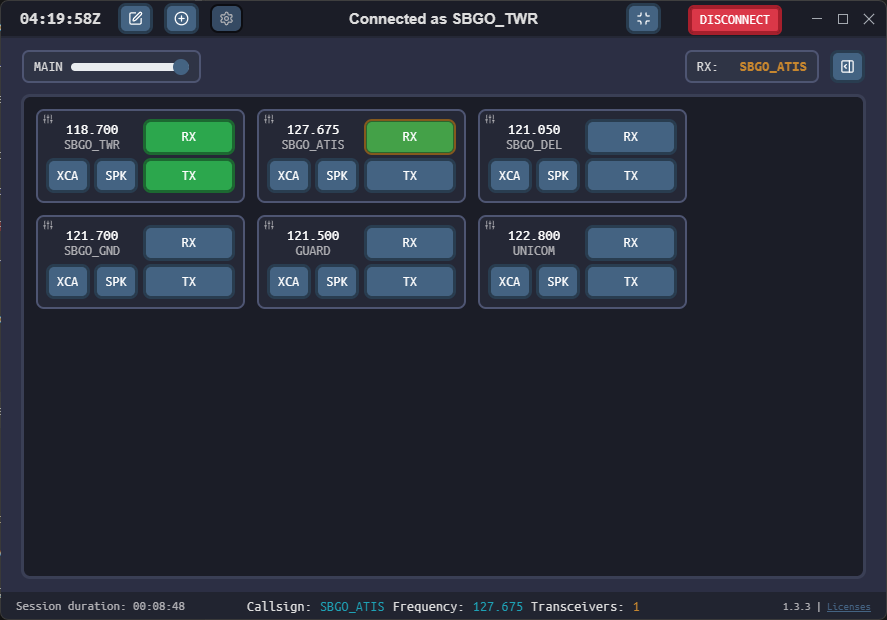
Track Audio allows you to listen to multiple frequencies at the same time. In this example, the controller is listening to:
- SBGO_TWR (118.700 MHz)
- SBGO_ATIS (127.675 MHz)
🔸 The RX button of the ATIS frequency is orange, indicating that there is an active transmission on that channel.
✅ This function is useful for controllers who need to monitor adjacent sectors or auxiliary frequencies, or who want to listen to the local ATIS during operations.
Main Volume Control
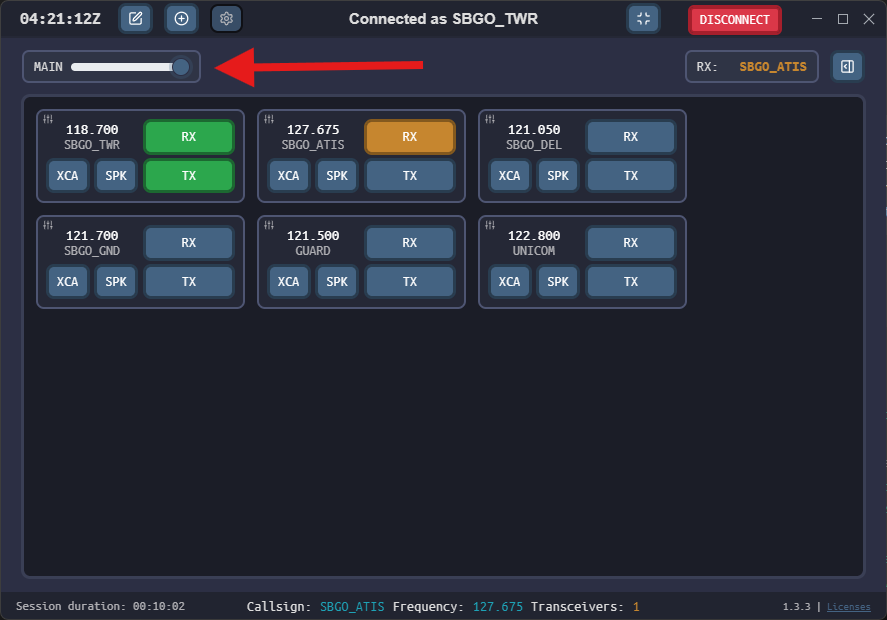
The slider shown above adjusts the main volume (MAIN) of Track Audio.
🔊 Moving the slider to the left will proportionally reduce the volume of all frequencies.
🔊 Moving it to the right will increase the overall volume.
This function is useful for making quick adjustments without having to set the individual volume of each RX frequency.
Minimized Mode (Docking)
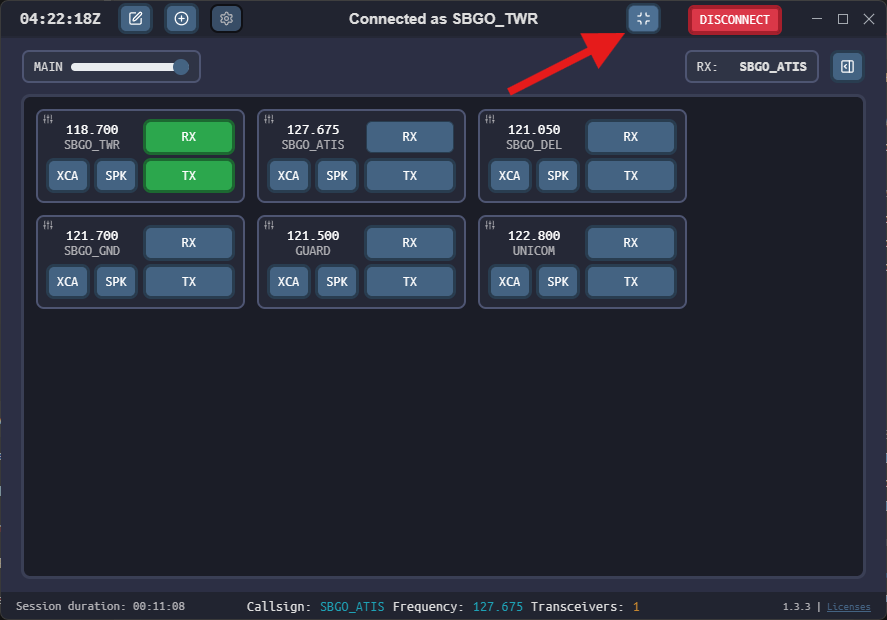
By clicking the button in the top-right corner, as shown in the image above, Track Audio enters minimized (docking) mode.
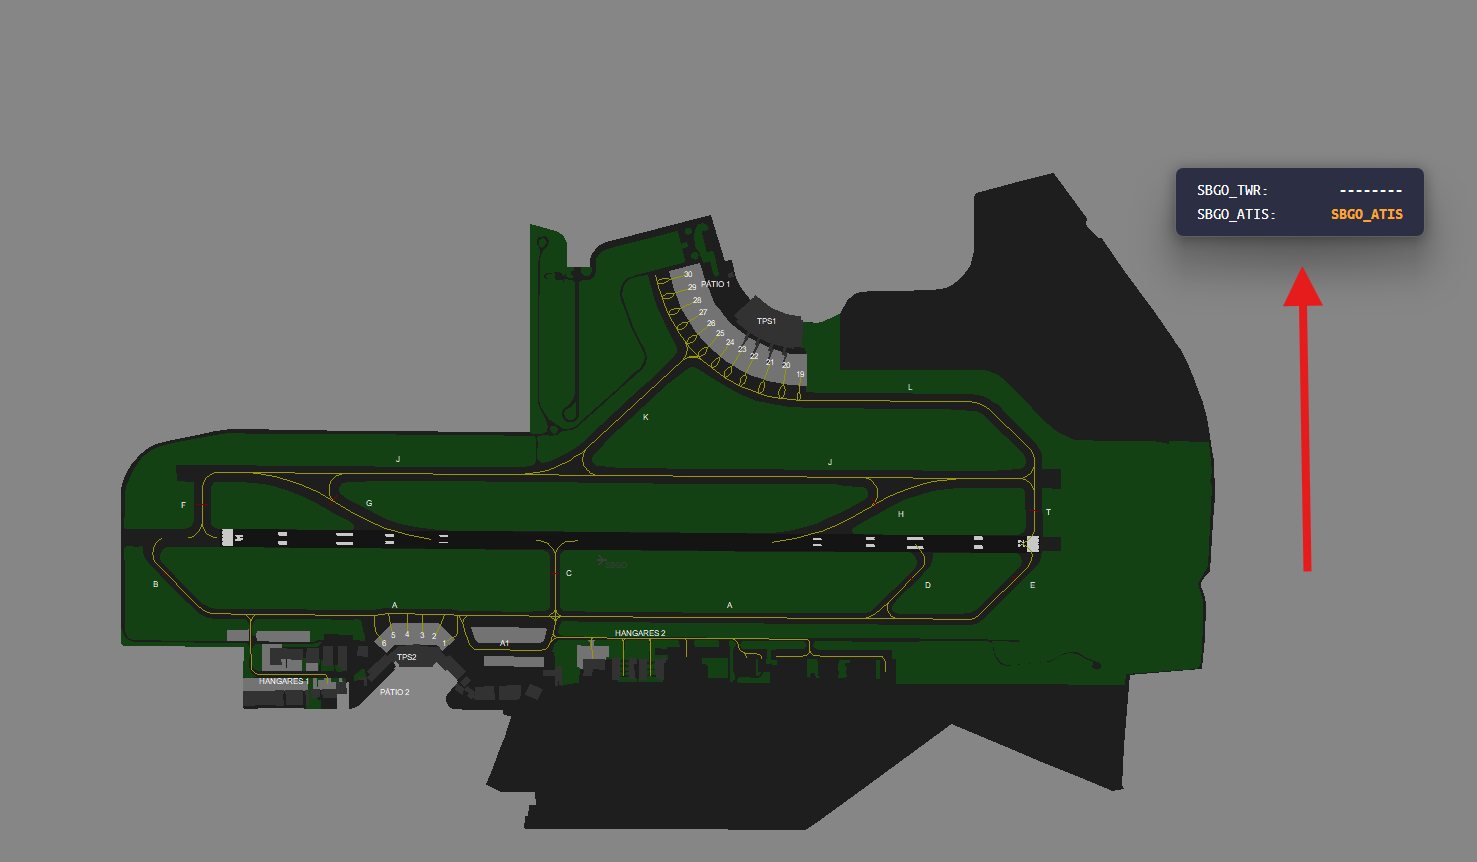
In this mode, TrackAudio appears as a small, unobtrusive floating window, usually placed over the EuroScope radar. It keeps working normally, displaying the active RX frequency (in this example: SBGO_ATIS).
✅ Ideal for keeping the interface clean while controlling, without losing track of the current frequency.
Frequency Monitoring in Minimized Mode
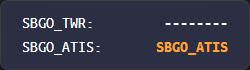
Even in minimized mode, TrackAudio displays important information about the monitored frequencies:
🔸 On the left, the configured frequencies are listed (such as SBGO_TWR and SBGO_ATIS).
🔸 On the right, the callsigns of the traffic that is transmitting are shown.
🟧 When the callsign is shown in orange, as in the SBGO_ATIS example, it means that there is an active transmission on that frequency.
➖ If only dashes "------" appear, it means that nobody has spoken on the main frequency yet.
✅ After the transmission ends, the callsign of the last station that spoke remains visible in white, showing the recent history.
Transmission Indicators and Session Footer
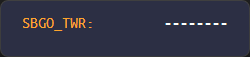
When you transmit on a frequency, your callsign will appear in orange, in both the minimized and maximized views. It turns white again at the end of the transmission and remains visible as history.
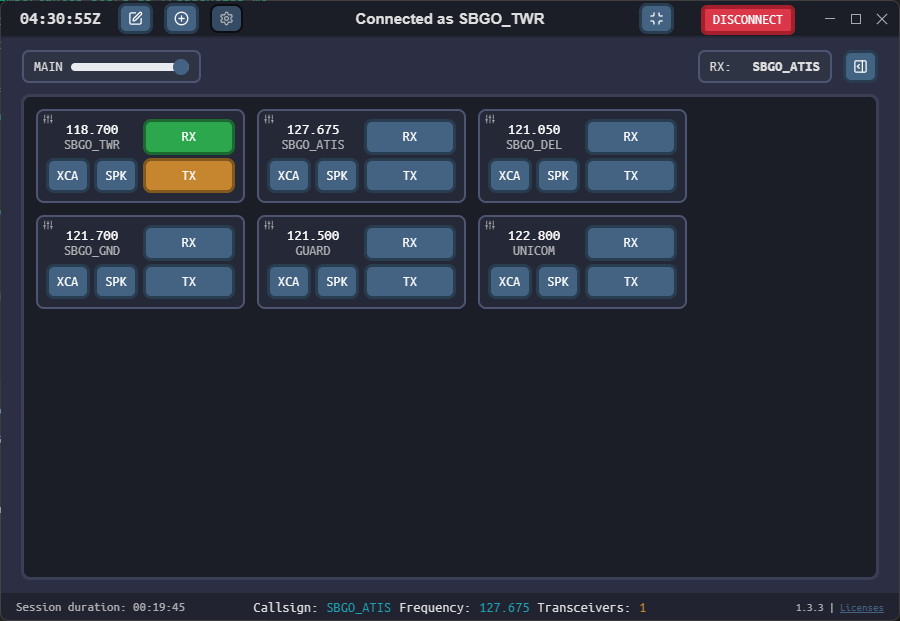
In the main interface, the TX button will also turn orange while you are talking (Push-To-Talk pressed).

In the Track Audio footer, you can see:
- ⏱️ Duration of the current session
- 📛 Your callsign
- 📡 The active frequency
- 📶 The number of transceivers in use on that frequency
This information helps you keep technical track of your session and check whether audio is being routed correctly.
Adding Frequencies Manually
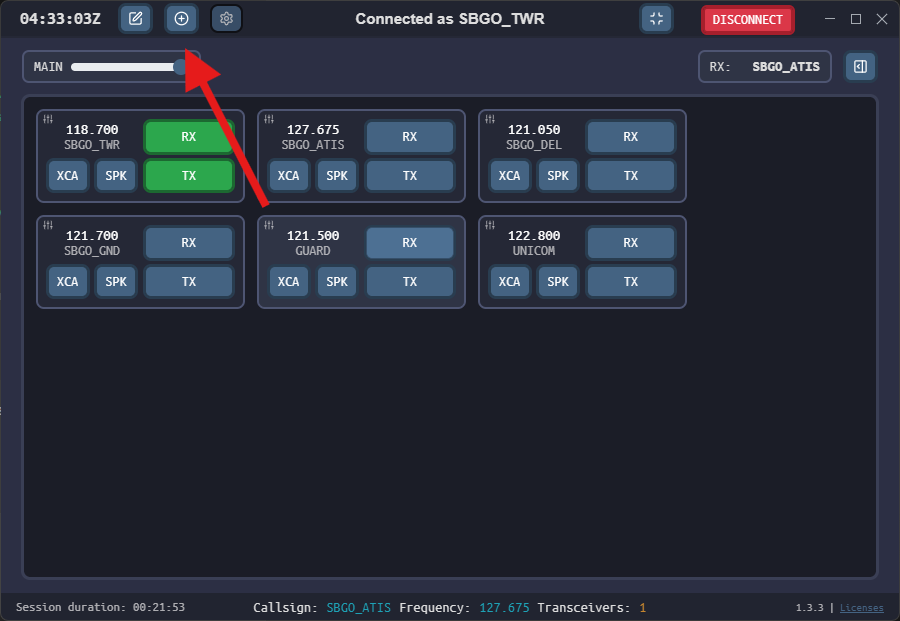
To add a new frequency to the Track Audio panel, click the "+" button located in the top-left corner, next to the edit and settings buttons.
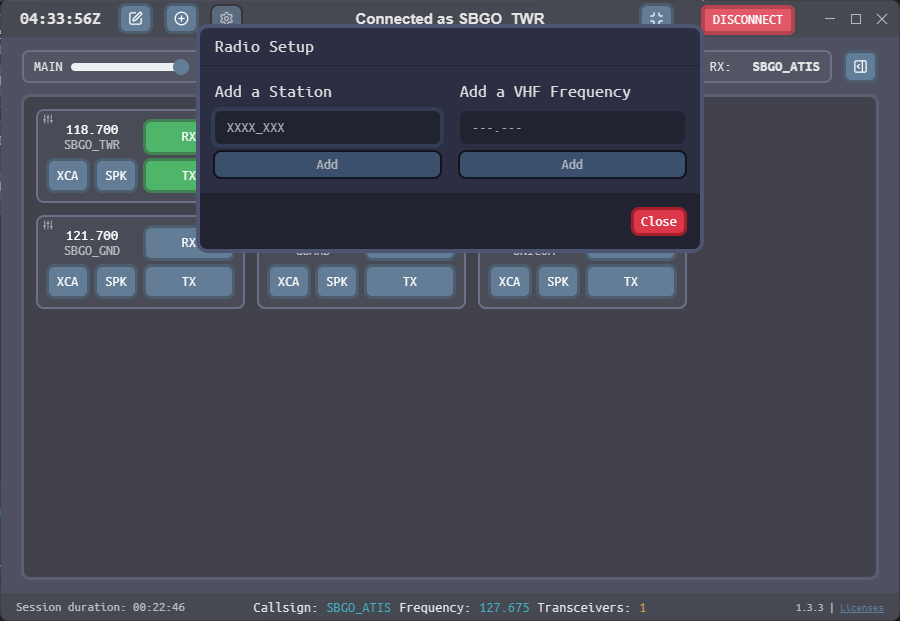
The configuration window will allow you to add:
- A station, such as `SBGO_GND`, `SBXP_APP`, `SBRE_W_CTR` etc.
- Or a VHF frequency directly, in the `XXX.XXX` format.
✅ This function is mainly useful for APP or CTR controllers who want to operate with more than one frequency or keep track of adjacent sectors within the same FIR.
Frequency Activity List (RX LIST)
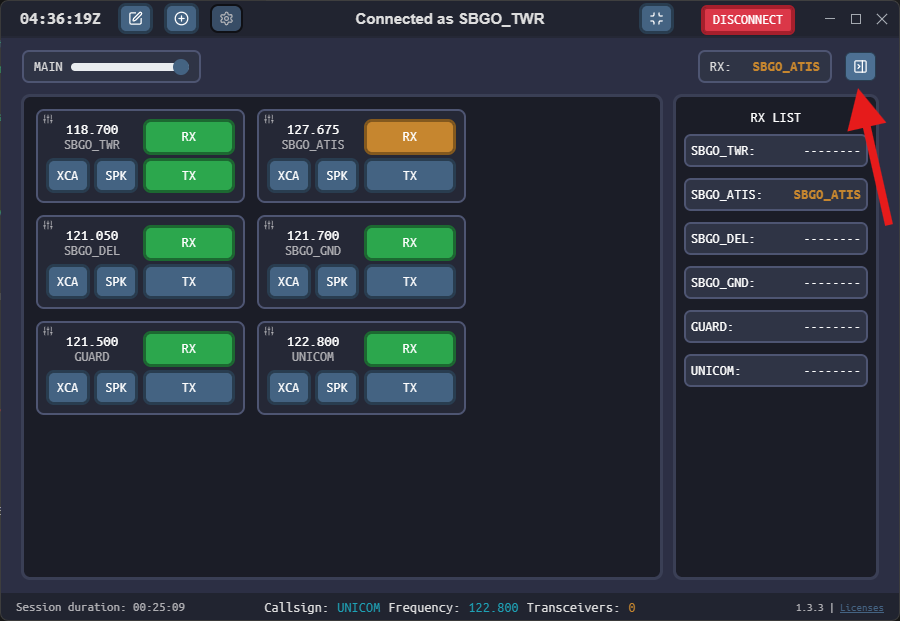
When you click the button next to the 'RX:' field, a side panel will open displaying the RX LIST.
This list shows all the frequencies you are monitoring, with the callsigns of the last stations that spoke on each of them.
🔸 Frequencies with currently active calls appear in orange.
🔸 Frequencies with no recent activity are marked with dashes `--------`.
✅ This view is useful for keeping track of multiple frequencies at the same time, especially in APP/CTR operations.
Ending your Control Session
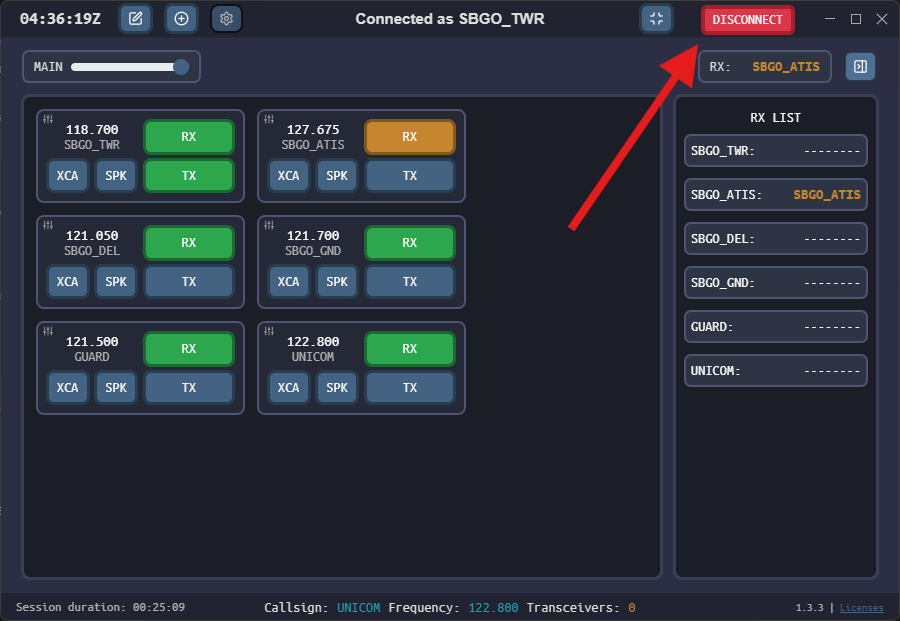
To end your audio session in Track Audio, just click the red DISCONNECT button in the top-right corner of the interface.
🔸 This will disconnect the controller from the VATSIM voice server and close the frequencies automatically.
🧠 Alternatively, when you disconnect from EuroScope, Track Audio itself will detect that your position has closed and will end the session automatically.
Disconnection Warning and Session Failure
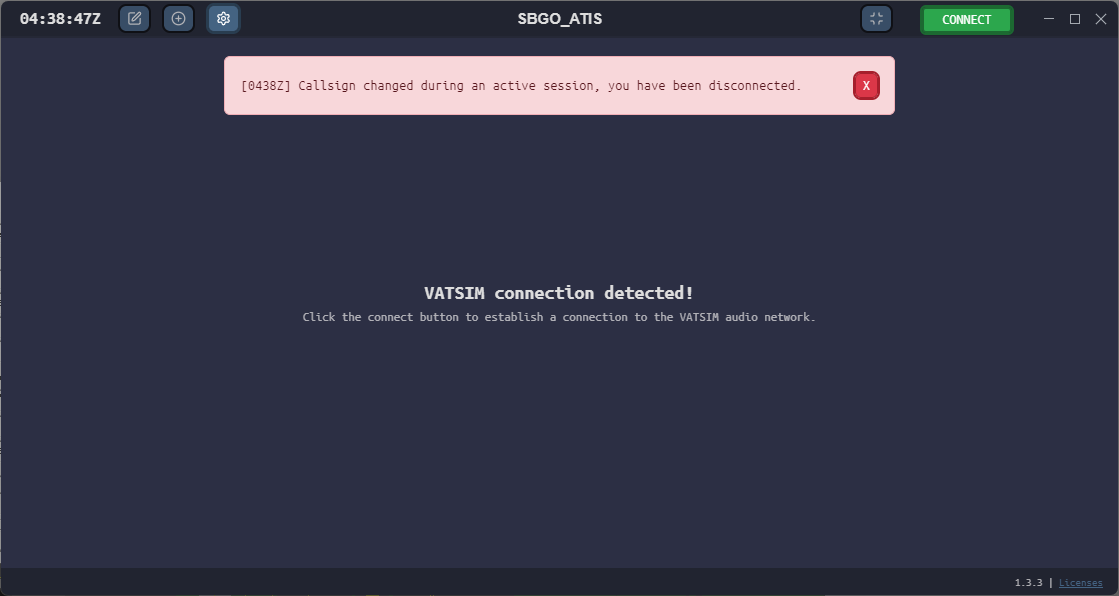
If you change your callsign during an active session or lose your connection to the VATSIM network, Track Audio will automatically end the voice session and display a prominent (red) error message.
🔴 The example above shows the warning: `[HHMMZ] Callsign changed during an active session, you have been disconnected.`
⚠️ In addition, loss of internet connection or of the EuroScope connection will also cause the session to end.
✅ Pay attention to the audible alerts emitted by the software to quickly identify any loss of connection.